
After you finish Building your Rolling Frame (Part 2 of 7), you can begin fitting the magnet assemblies and hanging your 4 doors. Your frame should be standing upright and level, with the hinges on each Corner Post facing out and the fin facing in. Keep the moving blanket or tarp spread out on the floor beside your frame, as each door is built flat before it goes up.
Gather Tools:
- 1/8 in (3 mm) Allen Wrench
- 7/16 in (11 mm) Wrench
- Ratchet and Socket Set (optional)
- Drill or Driver with Socket Adapter (optional)
- Safety Glasses
- Moving Blanket or Tarp
- Magnet and Bumper Hardware
- Door Hardware
We recommend safety glasses any time you drive hardware.
Step 1: Install the Magnet Assemblies
- Open your Magnet and Bumper Hardware.
- Attach a magnet to a threaded rod with one of the flat head hex screws, using a 1/8 in (3 mm) Allen wrench.
- Thread one of the large nuts onto the rod.
- Insert the assembly through the fin on any Corner Post.
- Thread a second large nut onto the open end of the rod to fasten the magnet assembly to your frame.
- Repeat for all remaining magnet assemblies.
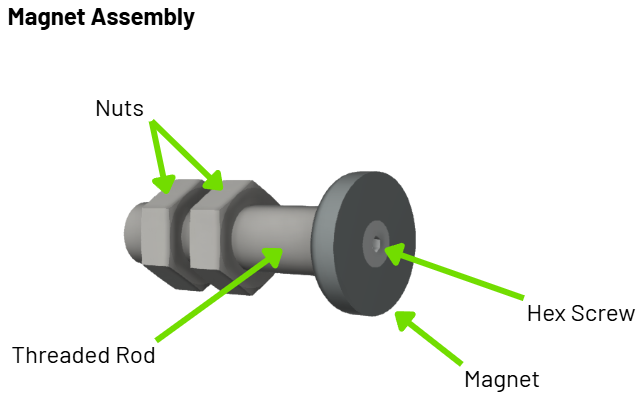
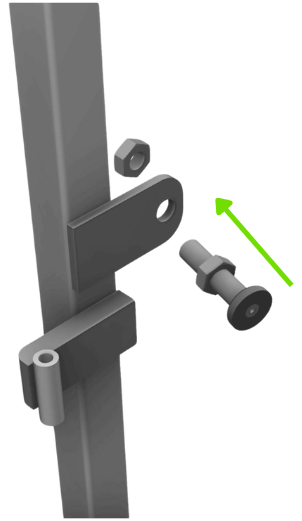
Your magnet assemblies line the doors up with the edge of the Tank so that light reaches your wall evenly. They also hold the doors closed during operation and transport, and they still let you open a door and reach your plants when you need to.
Step 2: Build a Door
- Lay one Door Hinge Post flat on the moving blanket or tarp with the fin facing up.
- Place 4 Light Arms next to the Door Hinge Post with the light brackets facing up, in the same direction as the fin.
- Insert a bolt into a Light Arm and through the Door Hinge Post.
- Slide the washers onto the bolt.
- Thread on the nuts.
- Snug the nuts by hand.
- Tighten every nut with a 7/16 in (11 mm) wrench, or with your ratchet and socket, once every piece is attached.
- Slide a plastic washer onto each door hinge.
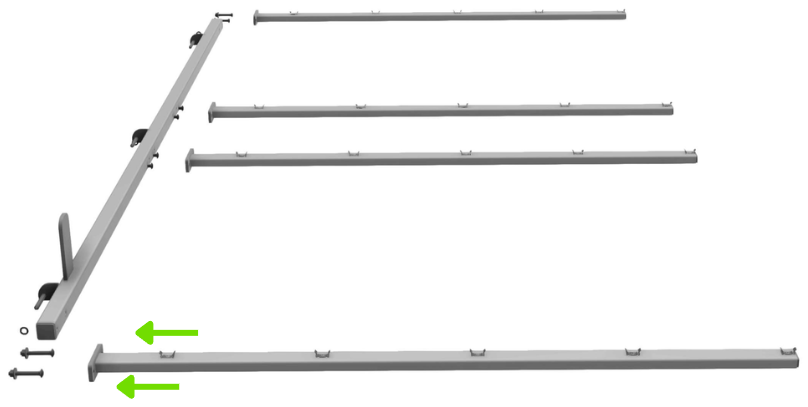
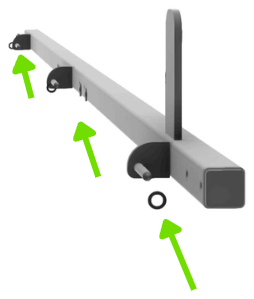
Each door is 1 Door Hinge Post and 4 Light Arms, which makes 16 Light Arms across your 4 doors. The brackets on those arms carry your Light Bars later, 10 per door and 40 across the Flex Acre, so keep all 4 arms facing the same way as you fasten them. Fit the Door Hardware as it is supplied, without modifying any part, so the doors hang square and the magnets line up.
Step 3: Hang the Door
CAUTION: THERE IS A RISK OF FINGER PINCHING IN THE FOLLOWING STEPS. CONSIDER USING A PARTNER TO MAKE MANEUVERING EASIER. FAILURE TO USE CAUTION MAY RESULT IN INJURY.
NOTE: ONE PERSON STEADIES THE DOOR ASSEMBLY WHILE THE SECOND PERSON GUIDES THE HINGE PINS ONTO THE CORNER POST AND KEEPS FINGERS CLEAR.
- Turn the door assembly so the light brackets face in toward your frame.
- Raise the completed door assembly carefully.
- Lower it into position on a Corner Post, starting with the hinge pin at the top of the door, as that pin is the longest.
- Line up the middle pin.
- Finish with the bottom pin.
- Let the door rest into position.
- Repeat Step 2 and Step 3 until all 4 doors are assembled and hanging.
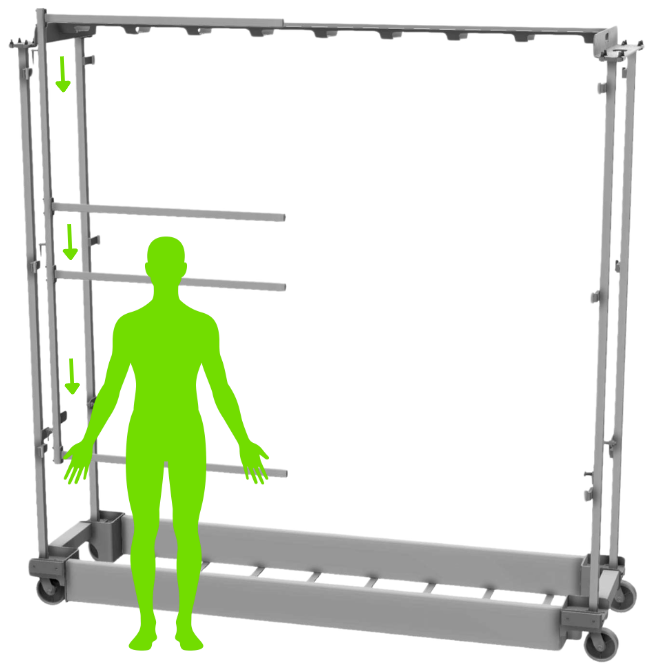
The top pin is the longest, which makes it the best one to start with, so work top, then middle, then bottom on every door. Your magnet assemblies are already fitted to the Corner Posts, so each door has something to close against as soon as it is resting in place.
All 4 doors are hanging and your magnetic latches are set—well done!
Next: Installing your Tank, Root Chambers & Panels (Part 4 of 7)