
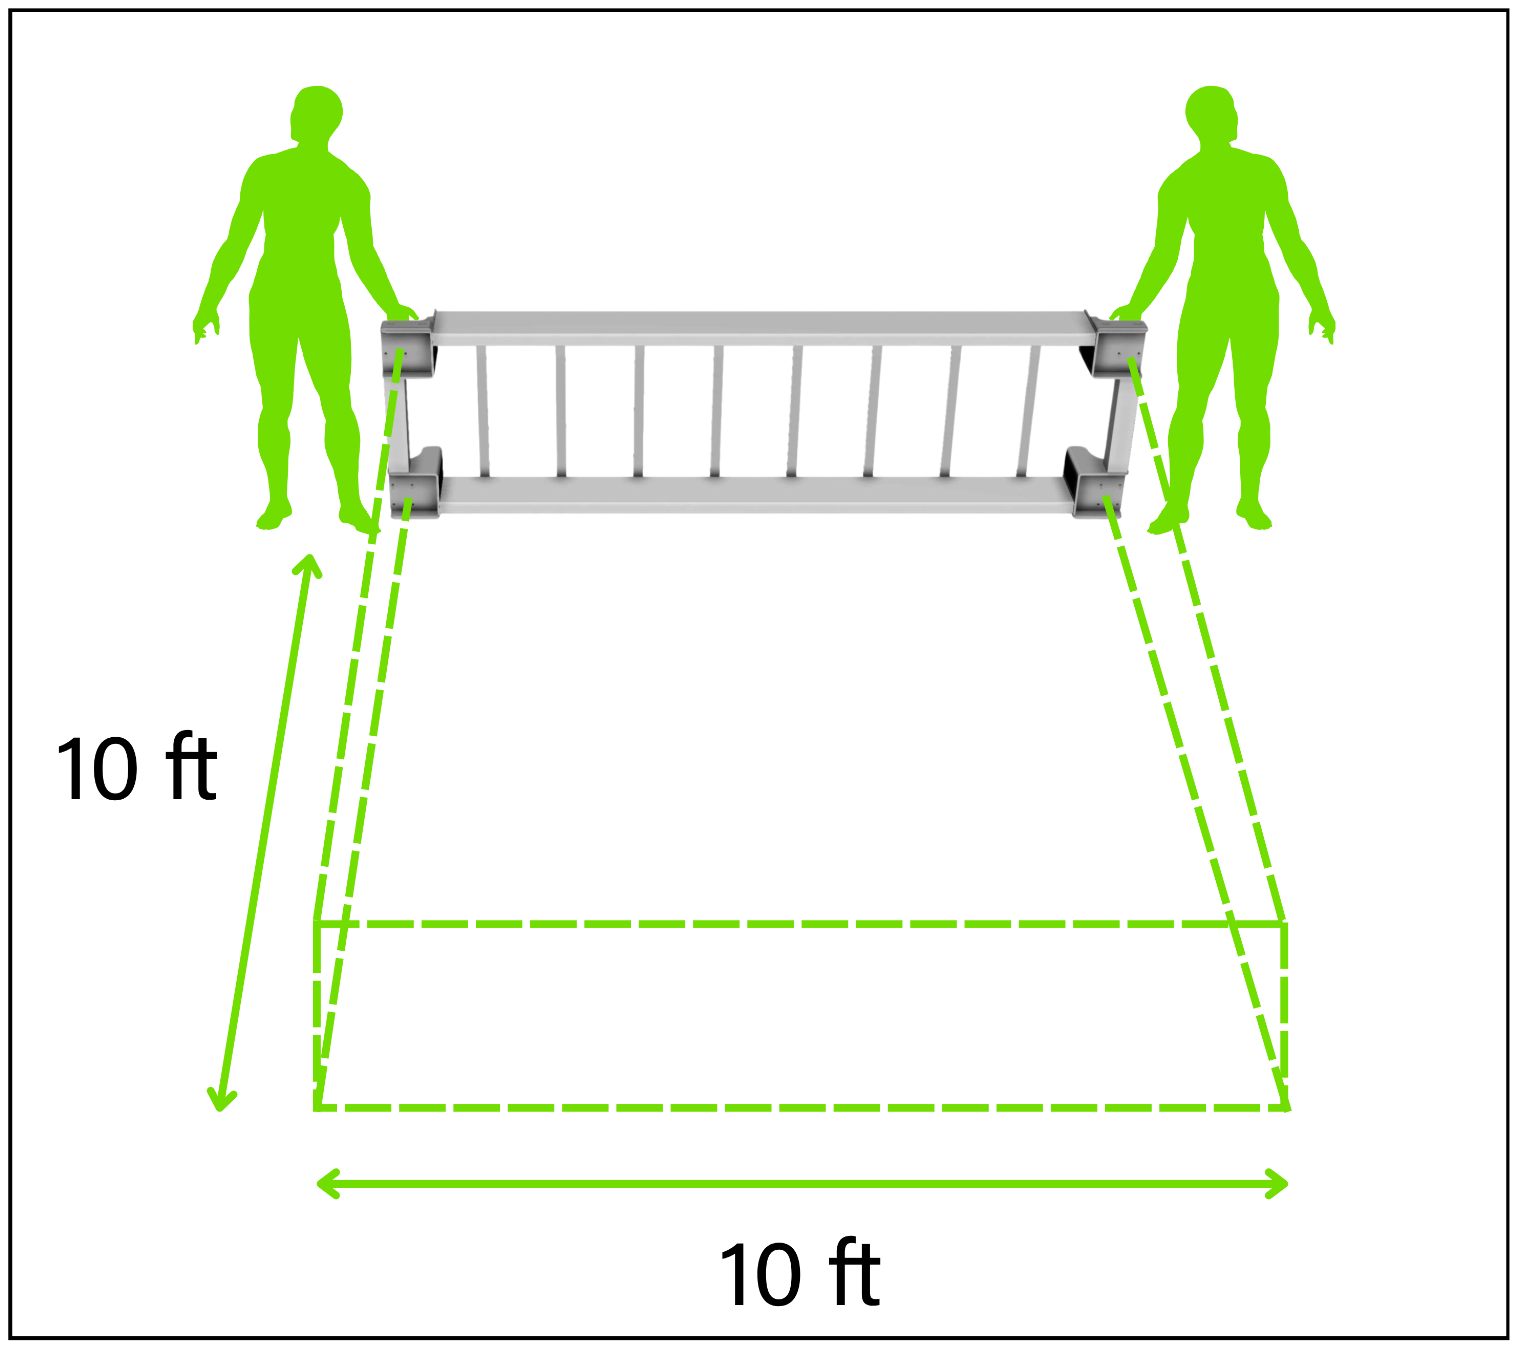
After you finish Unpacking & Preparing your Assembly Area (Part 1 of 7), you can begin building the Rolling Frame that your whole Flex Acre stands on. Work through your Skid Plates, Casters, Corner Posts and Cradle in order, and keep your 10 ft x 10 ft assembly area clear the entire time. We recommend safety glasses any time you drive hardware.
Gather Tools:
- Safety Glasses
- 5/32 in (4 mm) Allen Wrench
- 9/16 in (14 mm) Wrench
- Ratchet and Socket Set (optional)
- Drill or Driver with Socket Adapter (optional)
- Moving Blanket or Tarp
Step 1: Attach your Skid Plates
- Open your hardware sets.
- Remove the 4 Skid Plates and your Magnet and Bumper Hardware.
- Position each Skid Plate against the bottom of your Base Frame with the narrow side facing out.
- Fasten each Skid Plate with the 8 plate screws from your Magnet and Bumper Hardware, using a 5/32 in (4 mm) Allen wrench.
- Spread a moving blanket or tarp on the ground beside your Base Frame to protect both your floor and your Flex Acre.
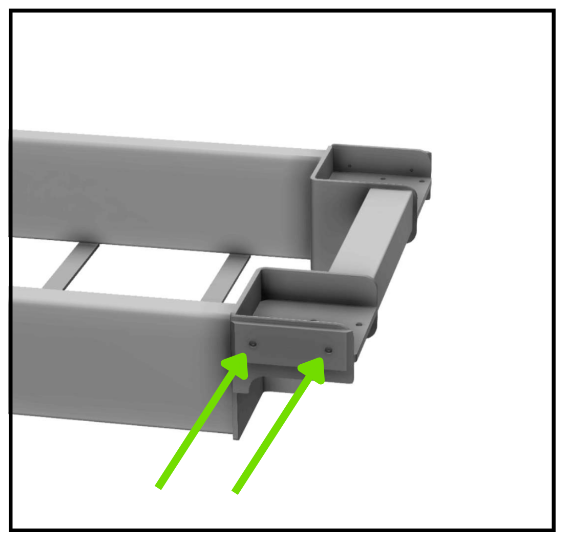
CAUTION: THE FOLLOWING STEPS REQUIRE TEAM-LIFTING. BE CAREFUL WITH YOUR FINGERS AND TOES. FAILURE TO USE CAUTION MAY RESULT IN BODILY HARM.
Step 2: Tilt your Base Frame onto its Side
- Clear enough space around your Base Frame to work on every side of it once it is down.
- Tilt your Base Frame onto its side, lengthwise, onto the blanket.
Step 3: Line Up your Corner Posts
NOTE: THIS STEP TAKES 2 PEOPLE. ONE PERSON HOLDS AND ADJUSTS THE CORNER POST WHILE THE SECOND PERSON FASTENS THE CASTER. A THIRD PAIR OF HANDS TO STEADY YOUR FRAME HELPS BUT IS NOT NECESSARY.
- Open your Corner Hardware.
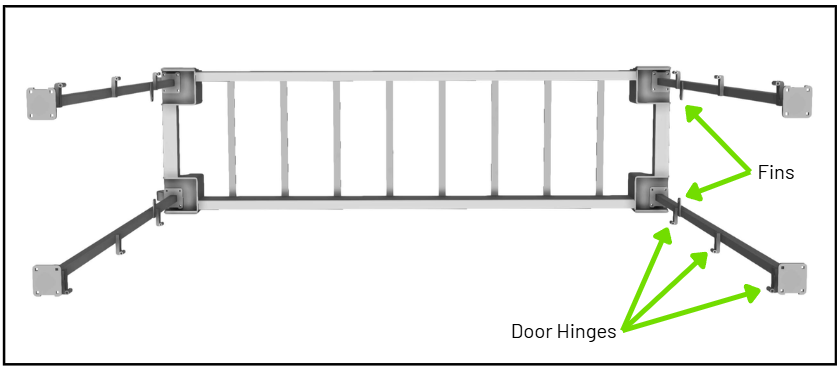
- Find Corner Post "A". The label sits on the mounting plate.
- Line up Corner Post "A" with its matching location on your Base Frame, starting with the lower posts nearest the ground so your Frame does not tip.
- Turn the post so the hinges face outward and the fin faces inward.
Step 4: Bolt on your Casters
- Place a Caster on your Base Frame beneath the Corner Post.
- Run the bolt through the Corner Post, then your Base Frame, then the Caster.
- Slide the washer onto the bolt.
- Thread on the nut.
- Snug the nut by hand.
- Tighten every nut on that corner with a 9/16 in (14 mm) wrench, or with your ratchet and driver.
- Repeat Step 3 and Step 4 for all remaining Corner Posts.
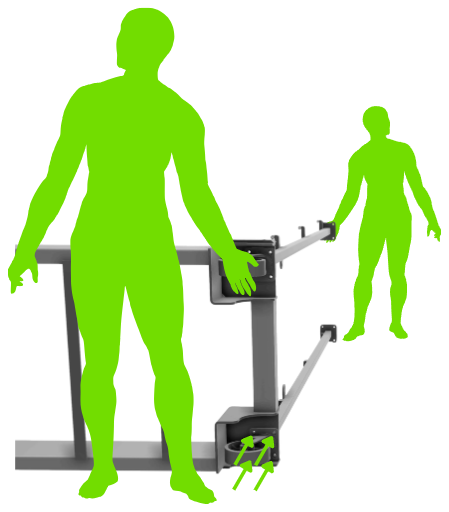
Your Casters mount under the Base Frame and your Corner Posts mount above it, so every bolt passes through all 3 parts before the washer and nut go on. Install each part exactly as supplied, so everything lines up and seals the way it should.
Step 5: Fasten your Cradle
- Lean your Cradle gently against the free ends of the Corner Posts, with the matching labels facing each other.
- Insert a bolt into the post and out through the Cradle.
- Slide the washer onto the bolt.
- Thread on the nut.
- Snug the nut by hand.
- Tighten every nut with a 9/16 in (14 mm) wrench once the rest of your Corner Hardware is attached.
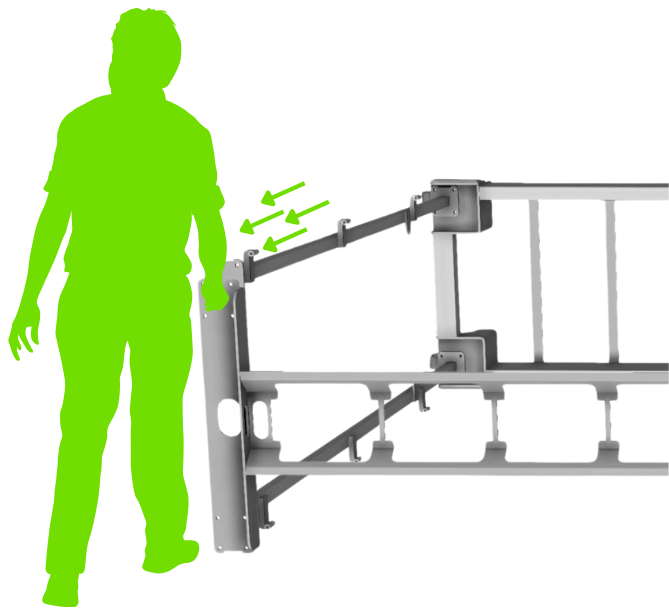
Step 6: Stand your Frame Upright
CAUTION: THIS IS THE HEAVIEST AND HIGHEST RISK STEP IN THE BUILD. ONCE ASSEMBLED, THE STEEL COMPONENTS OF YOUR FLEX ACRE WEIGH OVER 300 LBS. DO NOT ATTEMPT TO LIFT YOUR FRAME BY YOURSELF. FAILURE TO USE AN APPROPRIATE LEVEL OF ASSISTANCE MAY RESULT IN SIGNIFICANT BODILY HARM.
- Position a second person at the base to hold it, as the Casters let your Frame roll away from you.
- Lift your Frame at the Cradle end.
- Walk your Frame upward until it stands fully upright.
- Check that your Frame sits level on all 4 Casters before you let go.
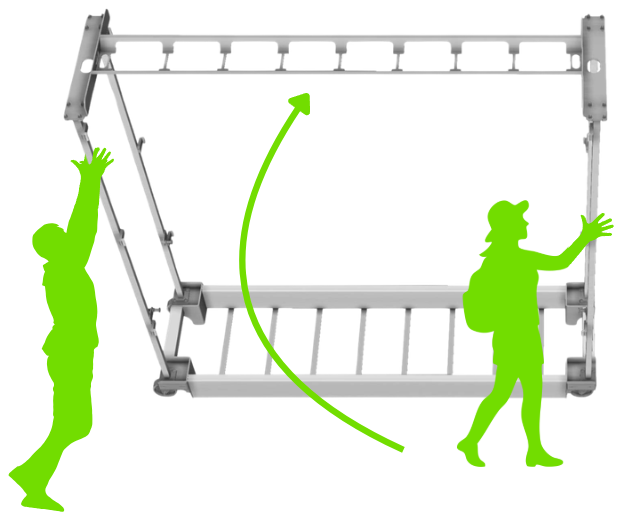
Walk around your Frame before you move on and check that every nut on the Corner Posts and the Cradle is tight. Your 4 doors hang from these same Corner Posts in Part 3, so tighten anything loose now rather than with 4 doors in the way.
Your Rolling Frame is now standing upright and level—well done!